| | 电视机改制音频示波器(转载,英文) 文章长度[ 8198] 加入时间[ 2006/7/1] 更新时间[ 2025/10/15 5:21:15] 级别[ 3] [ 评论] [ 收藏]
The Wave Vessel How To |
This document is released under The Creative Commons License. |
 |
Before we begin, I have to give everyone a warning.
DO NOT ATTEMPT THIS PROJECT!
THIS DOCUMENT DESCRIBES A DANGEROUS PROCESS. DO NOT ATTEMPT THIS UNLESS YOU KNOW THE DANGERS OF CAPACITORS AND OTHER ELECTRONIC COMPONENTS. THERE IS A GREAT RISK OF POTENTIALLY DEADLY ELECTRIC SHOCK, AND THERE IS THE POSSIBILITY OF FIRE OR EXPLOSION.
IF YOU TRY TO FOLLOW THESE INSTRUCTIONS, CENSTRON, OR ITS MEMBERS CANNOT BE HELD LIABLE FOR ANY DAMAGE OR DEATH CAUSED WHILE BUILDING OR USING THE DEVICE |
 |
Supplies List:
- various screwdrivers
- alligator clips
- wire
- soldering iron
- solder
- audio amplifier
- sound source
- multimeter
- audio jack
- DPDT switch
- rubber gloves
- and, of course, a television
For best results we recommend using an old black and white television, newer computer controlled (e.g. those with on-screen displays) televisions tend not to work, as they have electronics to detect abnormal activity, and then can shut down the tube, or have it behave erratically.
For those of you who are looking for Wobblevision, this is the same thing, but better. A Wave Vessel has switchable video modes, whereas wobblevision does not. Also, if you are looking for an Analog Visualization Unit, or AVU, this is the right place. |
 |
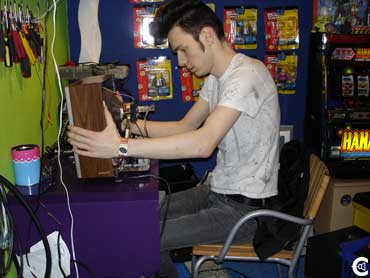
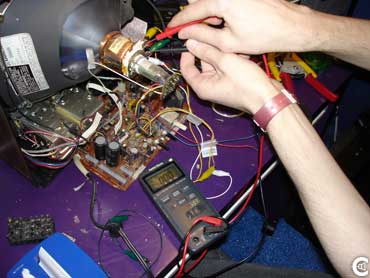
See that picture over there? DO NOT TOUCH ANYTHING ON THAT BOARD! Even if the television is not plugged in, the components can still contain enough electricity to give off a fatal shock, plus, avoid touching anything inside the television case.
First, put on the rubber gloves, they will help protect you from accidentally hitting part of the board, but, do not assume that they will protect you from dying. So, if you are wearing gloves, still do not touch any parts of the board, or any other components in the television. Once you have the gloves on, unscrew the case, to reveal the tube, and other electronics
|
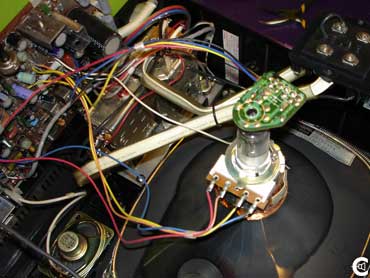 |
Once the tube is revealed you can see four wires connected to the back. These four wires control the electron gun, and enable it to "draw" the pictures on the screen. Two of the wires control the horizontal motion, and the other two control the vertical motion. Every television is different, so the order and color of the wires will vary from tv to tv. |
 |
The diagram to the left shows all six possible wire combinations. The diagram is drawn from the angle of looking directly at the back of the tube. The colors I used are just for reference, and may be different depending on the model of the television.
The television that we used for these instructions is type three. |
 |
This step is kind of dangerous, and there are two ways to accomplsh it, the easy way, and the safer way. I will only cover the safe way. First clip and strip all four of the wires going to the tube, then connect them all back up using alligator clips.
Then, remove one of the clips, and turn the telvision on. If you get a vertical line, then the disconnected wire is one of the horizontal drive wires, if you get a horizontal line, then you disconnected a vertical wire. Turn the television back off, then follow the same process for the other three wires to determine which direction each controls. |

The diagram above shows what happens when the different wires are disconnected. |
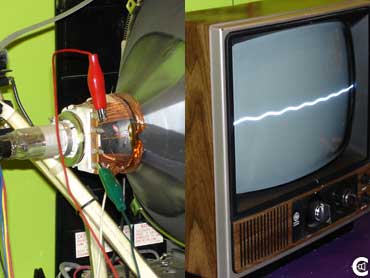
This picture shows how if you disconnect one or both vertical wires, the screen displays a horizontal line. |

And, this picture shows that the screen displays a vertical line if you disconnect one or both of the horizontal wires. |
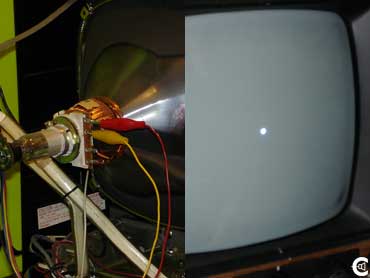
Now, finally, you will get a dot if you disconnect at least one vertical, and one horizontal wire. |
 |
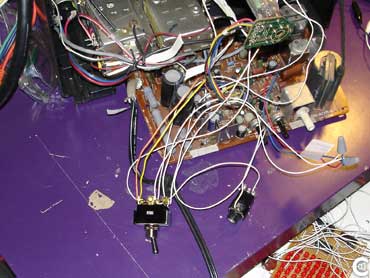
The diagram to the left shows how to run the wires, as I stated before, this TV is a type three, so, the wiring will be slightly altered.
First, connect the horizontal lines coming from the tv board to one set of inputs on the switch. Next, wire the vertical lines coming from the board to the other set of inputs on the switch. Then, wire the two outputs of the switch to the vertical inputs on the tube.
Once the switch is wired up, you can now connect the audio input. The audio jack we used is a mono 1/4" type. You then connect the positive and negative lines on the jack to the two horizontal inputs on the tube. Normally the way you connect the audio jack to the tv tube does not matter, however, in some cases, it does matter. When that happens, the tv will display nothing, or very little, so, just switch the way the wires are connected to the tube. |
Before you wire everything up, make sure that there is no voltage coming out of the tube from either inputs, which is where you will connect the audio jack. If there is a voltage, then it is recommended that you do not complete this modification. |
This is what the final wiring looks like. |
This is what the screen displays when the switch is one way. |
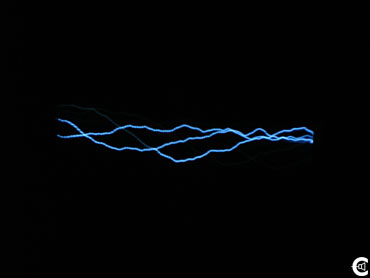
And, this is what it displays when the switch is on the other side |
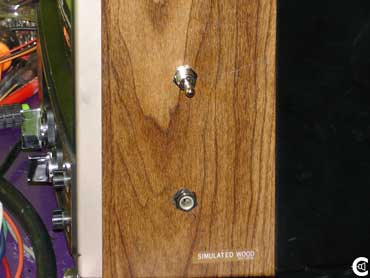
Finally, drill two holes in the simulated wood grain, and attach the switch, and audio jack to the holes. Now, plug it in, and crank up the tunes. |
Watch Here
See the Wave Vessel in action! |
1、 本站不保证以上观点正确,就算是本站原创作品,本站也不保证内容正确。 2、如果您拥有本文版权,并且不想在本站转载,请书面通知本站立即删除并且向您公开道歉! |